How to edit your campaign settings
At the heart of your Craftkit account are your campaigns. A campaign sends emails when an event takes place, and you can choose the add a delay for more control. Let’s explore how you can change these settings.
The first you need to do is to sign in to your craftkit account
Click on the campaign you want to edit
Your campaign settings consist of four parts:
Campaign status
A campaign is either active or inactive. An activated campaign sends emails based on an event and an optional delay.Name
Choose a descriptive name for your campaign. The campaign name helps you separate your campaigns from each other. Your customers will not see it.Event
A campaign connects to an event, which is something happening to your shop. The only exception is the contact creation event. That is when a customer subscribes to your email list in Craftkit. The other events are order creation, order shipment, and order delivery.Delay
Sometimes you want to wait a little bit after the event before sending an email. Here comes a delay into good use. For example, you can set a delay to wait two weeks after order creation before asking for feedback.
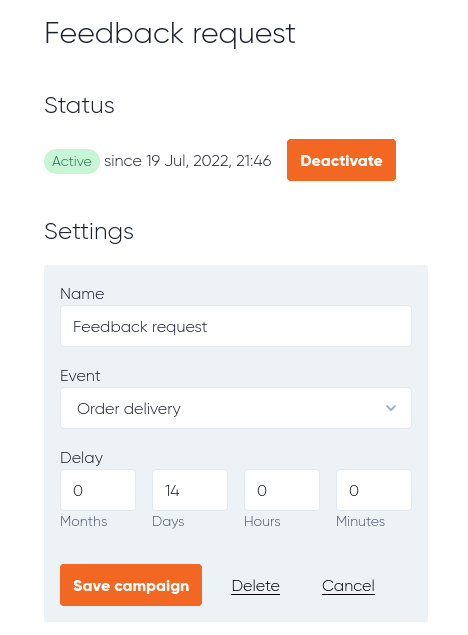
Click on save, and you are ready to go.